
This post contains affiliate links. I will earn a small commission at no additional cost to you.
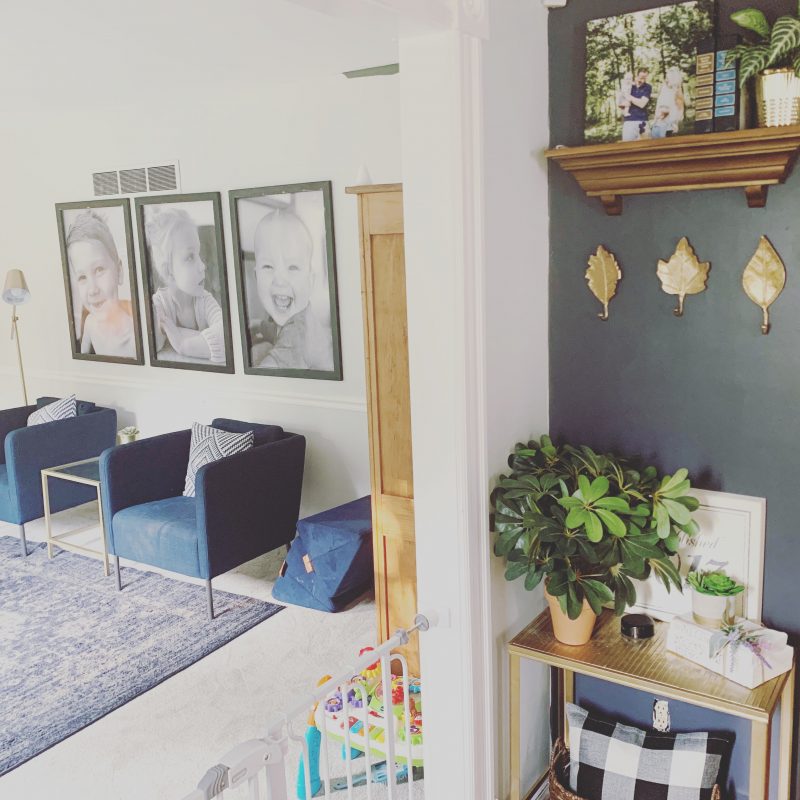
I have had my eye on black and white poster prints for EVER but I haven’t had the budget to pull the trigger! If you’ve been here for a minute, you’ll know my favorite thing to do is figure out a budget friendly way to grab the look I want. Here is how I created this upscale look for roughly $50 TOTAL!
Materials
- 24×36 frames
- poster prints from favorite picture printing company
- hanging materials
One thing I found out when starting this project is that frames are freaking expensive. My plan was to slowly gather frames using 50% coupons at Michaels but of course when Covid happened, I wasn’t able to get to the store to check out what I want or have the luxury of going once a week to grab another frame. Luckily, fate would have it, I would happen upon these HUGE frames in the GARBAGE! Seriously, I grabbed these for free from the trash. Now with that said, they are not in the best shape but nothing a little sanding and spray paint can’t fix. Also, the glass was broken in the frames but that was not a problem for me cause I knew I didn’t want glass in my frames!
Here is a similar frame linked from Michaels

I typically do not use Walgreens to print my photos cause I do not like the quality of their photos but I’ll be honest, I was anxious to get this done, knew I could pick up within an hour of ordering and they were having a sale for 50% off large prints. Honestly, I was impressed by the quality of my prints, they aren’t grainy at all. By the way, I took these photos with my iPhone on portrait mode. I looked into have poster prints made on Amazon, mpix, FedEx and Office Max but Walgreens was the only same day option.
Once I got my prints, I unrolled them so they laid flat and tried to figure out how to attach these to the frames. My first try, was using a staple gun but this was a NO GO! I repeat, do not try this! You are sooo welcome for trying this before you. Because I did not have the right size staple, it staple RIGHT through my frame. So I had to patch that hole in my frame.
After much debate and reaching out to some of my favorite DIY friends, I decided to get 3M mounting tape and attach the poster prints to the wall BEFORE hanging the frame!

I added the squares to each corner and the center of each print.
I knew I wanted 3 inches between each frame and the center of the frames to be about 60″ from the floor. So I measured, measured again and marked with painters tape. I then hung the pictures on the wall. I made sure to account for inch of space I needed to allow for the framing.
Once I had the posters up, it was time to hang the frames. The frames had wire across the back for hanging but if I used that it would’ve hung right through my kids faces and never worked. So I attached framing hardware to the back of the frames prior to hanging. Then I measured, leveled and hung the frames. Viola! I was done!
So my total cost breakdown:
Frames=Free
Prints=$45 @ $15/each
Poster mounting squares=$3.50
Total cost: $48.50